How to use KEDA to auto-scale a Azure Function consuming Blobs

Horizontal Pod Autoscaler (HPA), the built-in auto-scaling mechanism that comes with Kubernetes can scale replicas up or down based on the provided CPU and memory-based metrics. However, HPA isn't flexible enough to cover custom scenarios such as using external metrics as a source for scaling decisions.
That's where the KEDA comes in.
KEDA is a Kubernetes-based Event-Driven Autoscaler. With KEDA, you can drive the scaling of any container in Kubernetes based on the number of events needing to be processed. In the scenario described here, the number of blobs in the blob storage is the deciding factor for scaling pods.
This will be very useful in a couple of real-world scenarios. When you have a blob-triggered Azure function that processes large files it can save cluster resources by keeping the replicas to zero and only scaling the deployment when it detects a file in the blob storage. Also when there are a lot of files to process in the blob storage it can increase the number of replicas based on the number of blobs. Once the processing is completed it scales the replicas back to zero. Most of those parameters such as the maximum number of replicas, number of blobs before adding a new replica, etc.. are configurable.
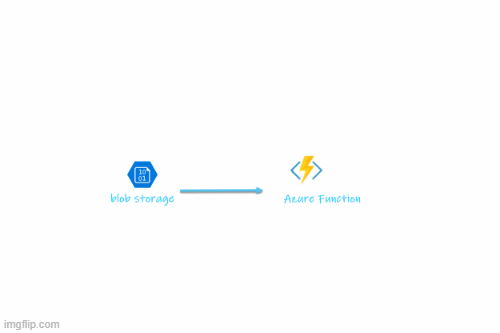
The following sample includes an Azure function in .Net core that triggers when new blobs are added to Azure Blob Storage and scale via KEDA.
The sample blob consumer will receive a single blob at a time(per instance) and write the blob name and size into the log to simulate performing work then delete the blob from the blob storage container. When adding blobs, KEDA will drive the pod to scale out according to the count of the blobs in a given blob storage container.
Pre-requisites
- Docker installed
- Azure Function Core Tools v2
- Kubernetes cluster with KEDA v1.1+ installed
- Helm
- Note that this sample refer to the GitHub repo that contains all the source code
Tutorial
1. Create a new directory for the function app
mkdir blob_consumer
cd blob_consumer
2. Initialize the directory for functions
func init . --docker
Select dotnet for function worker runtime
3. Add a new blob triggered function
func new
Select BlobTrigger for the template and enter blob_consumer for the function name
4. Create two Azure storage accounts.
We'll create two azure storage accounts. one for AzureWebJobsStorage and one for adding blobs for processing.
You can use the Azure CLI, the Azure cloud shell, or the Azure portal. The following is how you do it using Azure CLI.
<storage-name> would be replaced by two unique storage account names.
az group create -l westus -n hello-keda
az storage account create --sku Standard_LRS --location westus -g hello-keda -n <storage-name1>
az storage account create --sku Standard_LRS --location westus -g hello-keda -n <storage-name2>
5. Update the function metadata with two storage accounts connection strings.
Open the blob_consumer directory in an editor. We'll need to update both connection strings info for the blob trigger.
Run the below command twice to copy both connection strings for two storage accounts. Replace the <storage-name> with the unique storage account names given for <storage-name1> and <storage-name2> in above step.
az storage account show-connection-string --name <storage-name> --query connectionStringOpen local.settings.json which has the local debug connection string settings. Replace the {AzureWebJobsStorage} and {TEST_STORAGE_CONNECTION_STRING} with the above two connection string values:
local.settings.json
{
    "IsEncrypted": false,
    "Values": {
        "AzureWebJobsStorage": "DefaultEndpointsProtocol=https;EndpointSuffix=core.windows.net;AccountName=mystorageaccount1;AccountKey=shhhh===",
        "FUNCTIONS_WORKER_RUNTIME": "dotnet",
        "TEST_STORAGE_CONNECTION_STRING": "DefaultEndpointsProtocol=https;EndpointSuffix=core.windows.net;AccountName=mystorageaccount2;AccountKey=shhhh===",
        "BLOB_SUB_PATH": "blobsubpath/"
    }
}
6. Debug and test the function locally (optional)
Start the function locally
func start
Create a text file with sample text for testing the blob processing.
Go to your Azure Storage account in the Azure Portal and open the Storage Explorer. Select the <storage-name1> Blob container and upload the created text file for processing. ( Refer below image and note that this example use a subpath for detecting blobs hence "Upload to folder" has the value <blobsubpath>)

You should see your function running locally.
[15/10/2021 10:45:01 PM] Executing 'blob_consumer' (Reason='New blob detected: container-name/blobsubpath/blob-name.txt', Id=a2c528a0-9b49-456d-9680-ec6973b300d7)
[15/10/2021 10:45:01 PM] C# Blob trigger function Processed blob
 Name:blob-name.txt
 Size: 14 Bytes
[15/10/2021 10:45:01 PM] Deleting blob blob-name.txt
[15/10/2021 10:45:01 PM] Executed 'blob_consumer' (Succeeded, Id=a2c528a0-9b49-456d-9680-ec6973b300d7)
7. Build and push the blob consumer container image
You need to build and push the blob_consumer Docker image to a container registry before deploying it to the cluster. For example, to use Docker Hub:
export REGISTRY=slurplk
docker build -t blob-consumer .
docker push blob-consumer $REGISTRY/blob-consumer
8. Install KEDA
Follow the instructions to deploy KEDA in your cluster.
To confirm that KEDA has successfully installed you can run the following command and should see the following CRD.
kubectl get customresourcedefinition  scaledobjects.keda.k8s.io

NAME                        CREATED AT
scaledobjects.keda.k8s.io   2020-09-15T01:00:59Z
9. Deploy Function App using Helm
First, you need to update the deploy\blob-consumer\templates\secret.yaml file and add the two blob storage connection strings. Replace the below <storage-account-connection-string> and <blob-processing-storage-account-connection-string> with the two storage account connection string values created in step 4.
data:
  AzureWebJobsStorage:  {{ <storage-account-connection-string> | b64enc }}
  TEST_STORAGE_CONNECTION_STRING: {{ <blob-processing-storage-account-connection-string> | b64enc }}
Now deploy using Helm chart.
cd deploy
helm install blob-consumer  --namespace default blob-consumer
10. Add a blob and validate the function app scales with KEDA
Initially, after deploy should see 0 pods as the blob container is empty.
kubectl get deploy
Upload a file to the blob container (using the Storage Explorer shown in step 6 above). KEDA will detect the event and add a pod.
kubectl get pods -w
The blob file will be processed( this sample writes the blob name and size into the log to simulate performing work then delete the blob from the container). You can validate the file was consumed by using kubectl logs on the activated pod. After all the files are processed and the cooldown period has elapsed, the last pod should scale back down to zero.
Success!
Show me the Code
You can try this all from scratch by following these steps. You can also skip straight to the code solution here.
Additional Resources